Scheduling Tests
You can schedule tests to run automatically on machines where Test Services is installed.
- A schedule can include one or more tests — all recommended tests, all available tests, or a user-selected subset.
- In client/server environments, a schedule can target one or more machines: all machines, all instrument controllers, all clients, the server, or specific machines.
- Tests run using the credentials of the user who created or last modified the schedule, unless a service user is configured. See Setting up credentials.
- Creating, editing, and deleting schedules requires the Test Services Admin role.
- Schedule creation, modification, and deletion are logged in the OpenLab Shared Services system log.
- Once a schedule is set up, tests run whether or not you are logged in to Test Services.
Create a test schedule
-
On the Test Services navigator, click the calendar icon to open the Test Schedules page.
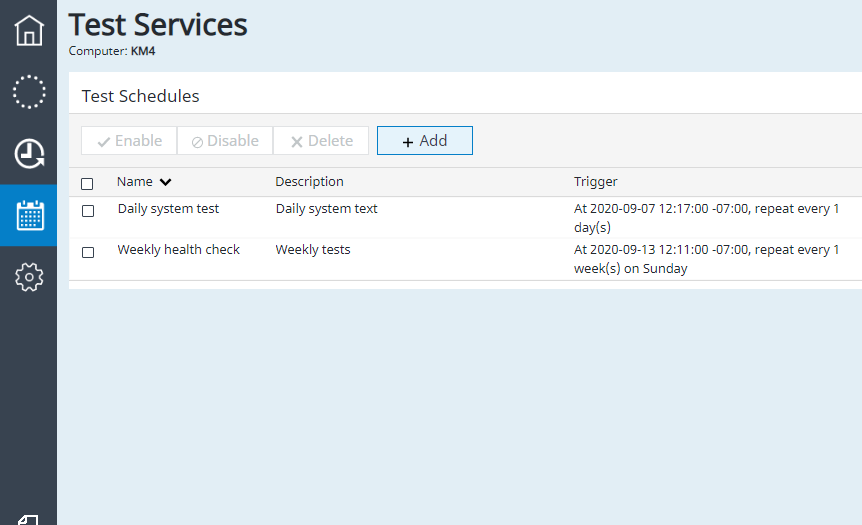
If no schedules exist, a blank form opens. If schedules exist, a list appears — click + Add to create a new one.
-
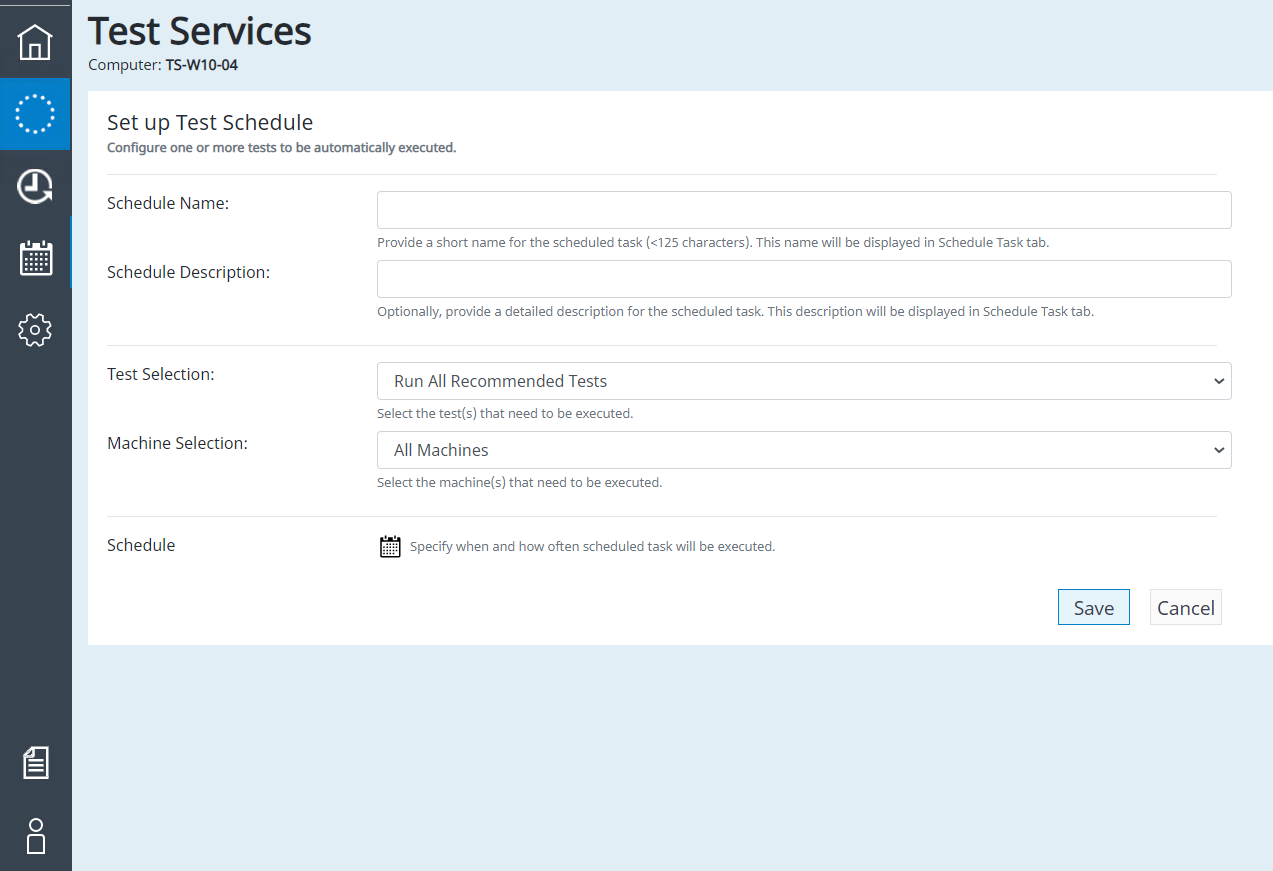
The Set up Test Schedule form opens.
-
Type a schedule name.
-
Optionally, type a description.
-
From the Test Selection drop-down, choose what tests to run:
- Run all tests — executes all available tests.
- Run all recommended tests — executes all tests recommended for the target machine.
- Run specific tests — opens a menu to select individual tests.
-
From the Machine Selection drop-down, choose the target machines:
- All machines
- All Instrument Controllers
- All Client Machines
- Server Machine
- Specific Machine(s) — lets you select individual machines.
-
Click the calendar icon next to Schedule to set the timing.

- Start at: click the calendar icon and select a date and time.
- Randomize start times: starts the schedule randomly within 30 minutes of the selected time.
- Repeat task: enables recurring execution. Select Hourly, Daily, Weekly, or Monthly and set the repeat interval.
- Weekly: optionally select specific days of the week.
- Monthly: optionally repeat by day of the month or day of the week.
- End: select Never to run indefinitely, or On date to specify an end date.
- Click OK to confirm the timing.
-
Click Save to save the schedule.
Enable or disable a test schedule
- Click the calendar icon to open the Test Schedules page.
- Select one or more schedules from the list.
- Click Enable or Disable at the top of the page.
Change a test schedule
- Click the calendar icon to open the Test Schedules page.
- Locate the schedule and click its Edit button.
- Make changes using the same form described in Create a test schedule.
Delete a test schedule
- Click the calendar icon to open the Test Schedules page.
- Select the schedules to delete.
- Click Delete at the top of the page.
- Click Yes to confirm permanent deletion.