Schedule tests
Set up a schedule so that Test Services runs tests automatically at the times you choose, without anyone logging in to start them. This page is for Test Services administrators who manage automated verification on the machines in their lab.
Prerequisites
- You must have the Test Services Administrator role. (The Test Schedules tab is unavailable to users who have only the Test Services User role.)
- The machines you want to target must be connected to the same Test Services server.
- (Optional) You need a service account if you want scheduled tests to run under a fixed account rather than your own (see Set up credentials for running tests).
A schedule runs whether or not you are logged in. By default, tests run under the credentials of the user who created or last modified the schedule, and schedule creation, modification, and deletion are recorded in the OpenLab Shared Services log.
Create a schedule
A schedule names the tests to run, the machines to run them on, and the timing. You set all three on the Set up Test Schedule page.
-
Click the calendar icon to open the Test Schedules tab.
-
Click Add.
The Set up Test Schedule page opens.
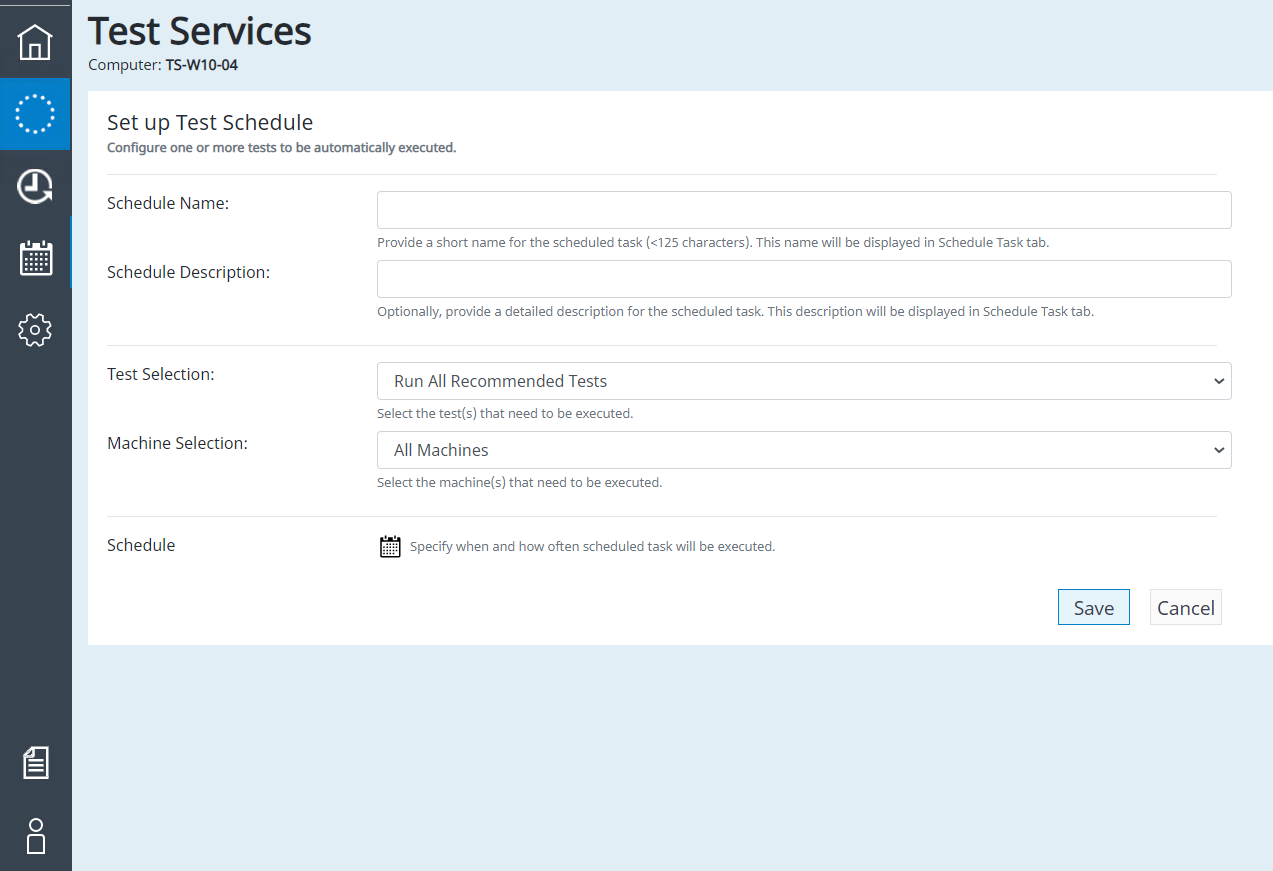
Figure 6. The Set up Test Schedule page, where you name the schedule and choose tests and machines.
-
Enter a name for the schedule. (The limit is 125 characters.)
-
Optionally, enter a description.
-
Select what to run from Test Selection:
- Run All Tests runs every available test on each target machine.
- Run All Recommended Tests runs the tests recommended for each target machine type.
- Run Specific Test(s) lets you select individual tests from a list (see Available tests).
-
Select the target machines from Machine Selection: All Machines, All Instrument Controllers, All Client Machines, Server Machine, or Specific Machine(s).
-
Click the calendar icon next to Schedule to set the timing (see Set the timing).
-
Click Save.
The new schedule appears in the Test Schedules tab and is shared with every Test Services instance connected to the same server.
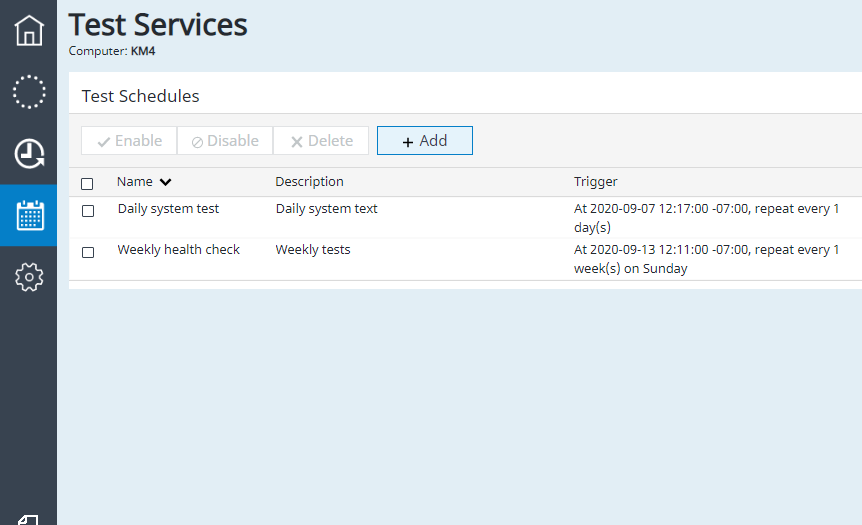
Figure 7. The Test Schedules tab listing existing schedules with their name, description, and trigger.
The Save button stays disabled until the form is complete. If a required field is missing, an error message tells you what to add.
Set the timing
You set the start time, repeat pattern, and end date in the Change Test Schedule popup, opened from the calendar icon on the Set up Test Schedule page. A Summary field updates as you make each change so you can confirm the pattern.
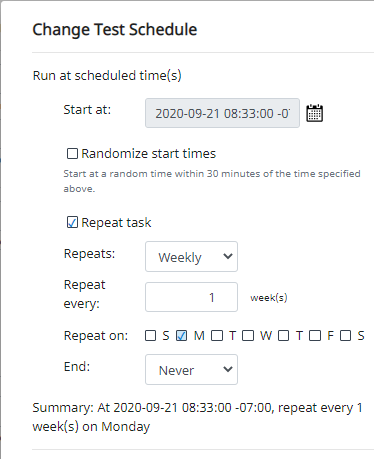
Figure 8. The Change Test Schedule popup, where you set the start time, repeat pattern, and end date.
- Set Start at to the first date and time the schedule runs.
- To repeat the schedule, turn on Repeat task and select an interval:
- Hourly or Daily repeats every set number of hours or days.
- Weekly repeats on the days of the week you select.
- Monthly repeats by day of the month (for example, the 15th) or by day of the week (for example, the second Monday). For a day that does not exist in a shorter month, the run falls on the last day of that month.
- Set End to Never to repeat indefinitely, or to On date to stop after a date and time you choose.
- Optionally, turn on Randomize start times to offset each run by a random amount within 30 minutes of the start time.
- Click OK.
Enable or disable a schedule
A disabled schedule stays in the list but does not run until you enable it again. Use this to pause automated runs without losing the configuration.
-
Open the Test Schedules tab.
-
Select one or more schedules.
-
Click Enable or Disable.
The Status column updates to Enabled or Disabled.
Edit a schedule
You change an existing schedule on the same page you used to create it.
- Open the Test Schedules tab.
- Click the Edit button for the schedule.
- Change the test selection, machine selection, or timing.
- Click Save.
Delete a schedule
Deleting a schedule removes it from the list and stops all future runs.
-
Open the Test Schedules tab.
-
Select one or more schedules.
-
Click Delete.
-
Confirm the deletion when prompted.
The selected schedules are removed from every Test Services instance connected to the same server.
Deleting a schedule cannot be undone. Confirm you have selected the correct schedules before you delete, because future automated runs stop immediately.
See also
- Run verification tests: start tests manually from the home page.
- Set up credentials for running tests: run scheduled tests under a service account.
- Set up email notifications: receive a summary of scheduled and manual runs by email.
- View test history: review the results of completed scheduled runs.
- Roles and privileges: the administrator role required to manage schedules.